What Is the Best Motorcycle GPS Mount?
Choosing the best Motorcycle GPS Mount is less about appearance and more about control. The device should stay readable, resist vibration, and remain easy to reach without distracting the rider. A mount that looks sturdy in a shop may behave differently on broken pavement. Small details matter: clamp fit, locking strength, cable clearance, and whether the screen tilts into sunlight.
For a practical selection rule, this guide uses a clearly labeled fictional composite expert, motorcycle touring technician Alex Morgan: “A good mount holds steady, keeps the screen visible, and never asks the rider to take their eyes off the road for long.” That is an editorially written line, not a quote from a real, independently verified specialist. It reflects the core checks riders can make before buying.
The sections ahead compare handlebar, stem, and crossbar mounting options, along with materials, adjustment range, and device compatibility. We’ll also consider how glove use and rain covers affect everyday operation. No mount suits every cockpit. Measure your bars, check available space, and test the viewing angle while parked. Then inspect the setup after a short ride; looseness or screen shake deserves attention. A quiet, stable fit is the goal. The trade-off is real: more adjustability can mean more joints to inspect, and a low price may leave fewer fit options.
How Motorcycle GPS Mounts Hold and Protect Navigation Devices
What Is the Best Motorcycle GPS Mount?
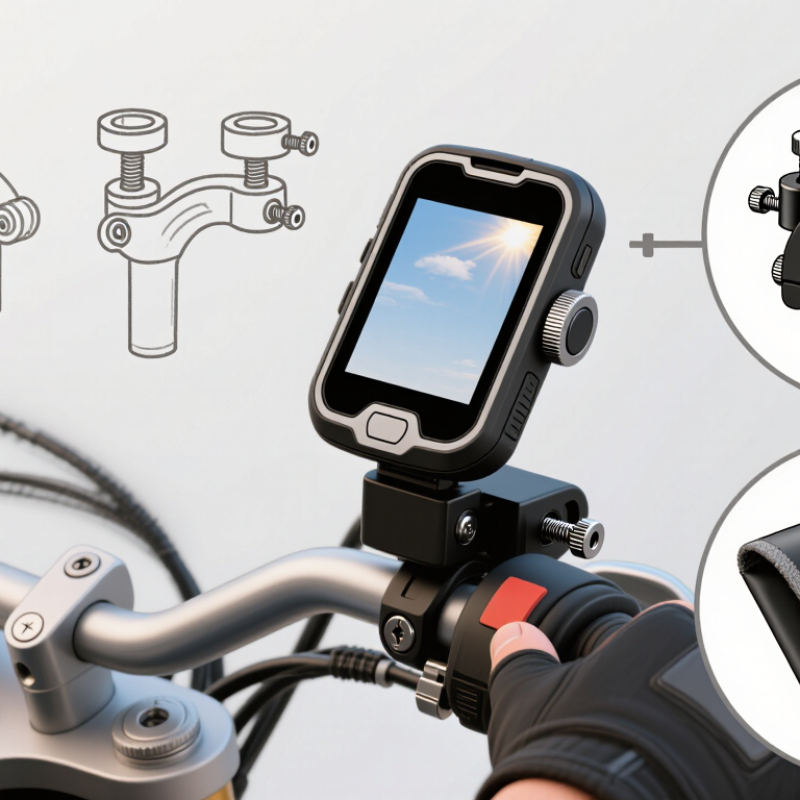
A motorcycle GPS mount must hold a navigation device steady while handling vibration, wind, and sudden bumps. Most systems use a handlebar clamp, a ball joint, and a cradle or locking holder. The clamp should fit the bar securely without slipping or crushing cables. Rubber-lined contact points can improve grip and reduce vibration. Small details matter.
The cradle protects the device by supporting its edges and limiting movement. A raised lip or locking arm can help keep it seated on rough pavement. Some mounts include vibration-damping inserts, which may reduce stress on the device over time. They are not a guarantee against damage. Check that the holder leaves buttons and charging ports accessible, and that the screen remains easy to see from the riding position.
Weather protection depends on both the mount and the device. A close-fitting cradle may shield the sides, but it cannot make a device waterproof. A compatible cover can help keep out rain and road spray. Before riding, tug the device gently, check the clamp bolts, and make sure the mount does not block steering movement. Recheck it after the first few rides; hardware can loosen, and a setup that looks secure in the garage may behave differently on a bumpy road.
Key Factors for Choosing a GPS Mount
A good motorcycle GPS mount should hold the device steady without making it hard to read or reach. Start by checking compatibility: the cradle must fit your device, while the mounting hardware must suit your handlebar or chosen mounting point. Measure the available space before buying. Small differences matter. A bulky clamp can crowd nearby controls, and a screen placed too low may pull your eyes away from the road for too long.
Vibration resistance is another key factor, especially on rough pavement or longer rides. Look for a secure locking mechanism and materials designed to handle repeated movement. Weather protection matters too, but a mount alone may not make a device waterproof. Check the device’s own rating and keep charging connections protected from rain.
Adjustability helps you reduce glare and find a readable angle while parked. Test the setup before riding: turn the handlebars fully, check that cables do not snag, and make sure the screen stays in place with a firm hand push. It can still feel awkward at first.
Recheck the fasteners after the initial rides, since settling or vibration may loosen them. A little inconvenience during installation is better than a distracting screen on the road.
How to Install and Position a Motorcycle GPS Mount
A good motorcycle GPS mount keeps the screen visible without making the controls harder to reach. Choose a position that suits your posture, not just an empty spot on the handlebar. With the bike parked and the engine off, sit in your usual riding position and check whether the display stays within a quick glance. It should not block the instrument panel or your view of the road. Small shifts matter.
Before tightening anything, turn the handlebars fully left and right. Check that cables, brake lines, and switches move freely and do not catch on the mount. Follow the mount’s installation instructions, tightening fasteners evenly rather than forcing them. A bracket that feels solid while parked can still loosen under vibration, so recheck it after your first short ride. I find this step easy to rush.
Angle the screen to reduce glare, then check it in daylight from your normal position. Keep charging wires away from hot surfaces and moving parts, and secure any loose length. Test the setup while stationary before riding. If the screen shakes, shifts, or distracts you, reposition it; a perfect-looking cockpit is not worth a poor view.
Matching a GPS Mount to Your Motorcycle and Riding Needs
What Is the Best Motorcycle GPS Mount?
Matching a GPS Mount to Your Motorcycle and Riding Needs
A GPS mount should fit the motorcycle before it fits the device. On a naked bike, handlebar space may be limited by mirrors, levers, and a tall phone cradle. A touring motorcycle often offers more room, but a wide screen can still block the instrument panel. Small details matter. Measure available space with the handlebars turned fully left and right, not only while parked straight.
Riders who travel rough roads should consider vibration control and a secure locking mechanism. Too much movement makes the map hard to read; a mount placed too high can catch wind and increase glare. For short commutes, a compact bar clamp may be enough. Long-distance riders may prefer an adjustable arm that keeps the screen near eye level without hiding traffic. It is tempting to choose the most rigid setup, but stiffness alone does not guarantee a clear image.
Weather exposure and charging needs also shape the choice. Check whether the mount holds the GPS case firmly, leaves buttons accessible with gloves, and routes cables away from steering joints and hot surfaces. Before riding, tug the unit gently and turn the bars through their full range. Check it again. I would reassess the position after the first bumpy ride; a parked-bike fit can look perfect and feel wrong on the road.